Monday, September 28, 2009

It's totally salad...


...Taco Salad

This is my kind of "healthy dinner." It's basically a burrito on a plate. I started with some ground turkey, grilled it up with a healthy dose of cumin, paprika, chile powder and tabasco sauce. I combined it with a can of Pinquitos, my very favorite bean ever, as well as some veggies and plenty of cheese. The dressing was a combo of green salsa and ranch dressing, and I served it with torilla chips.

This is an adaptation of one of my very favorite dinners growing up. My mom made a great taco salad... I think it had hamburger meat and cool ranch doritos in it, along with lots of cheese. It was delicious! I have made some really healthy versions of this same recipe, but the one I made the other night wasn't the healthiest... it had everything but the cool ranch doritos.

Ground Turkey Taco Salad
1/2 lb. Lean Ground Turkey
1 tbsp. cumin
1 tsp. paprika
1 tsp. chili powder
liberal dash of tobasco

Salad Contents
1 can pinquitos
1 head romaine lettuce
1 small red onion
1/2 cont. small cherry tomatoes
1/2 red bell pepper
crushed tortilla chips
lite shredded cheese
Sliced avocado

Dressing
1/4 cup lite ranch dressing
1/2 cup green tomatillo salsa

Brown up the turkey and add the spices. While the turkey is cooking warm up the pinquitos, then drain them and add them to the turkey. Chop the veggies and add in the meat mixture in a large bowl. Throw in the cheese and crushed tortilla chips and mix everything together. I dressed it with a ranch dressing green salsa concoction.

I sliced avocado on top and served it with tortilla chips. It made me feel like I was a kid again...

Thursday, September 24, 2009

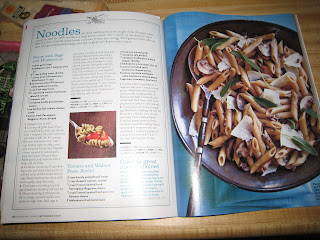
Hilary vs. Cooking Light Magazine - Penne with Sage and Mushrooms


I LOVE Cooking Light Magazine. I get so excited when it comes every month and I devour the photos and the recipes, and take a lot of inspiration from it... but it seems like I never actually cook the recipes. I have the best intentions every month, and I absolutely refuse to throw them away (much to Ryan's shagrin) because I'm sure eventually I will need a recipe from the April 06 issue. So I had an idea. Maybe I should try replicating at least one recipe every month so I feel like I'm getting my money's worth.


My first try was last night: the Penne with Sage and Mushrooms recipe on pg. 122 of the September issue. The final result was delicious, but not exactly the 350 calorie per serving creation from the magazine. I also learned that even when I try I can't measure exactly, but I figure it's not baking so as long as it tastes good that doesn't matter... right?


I got home from work around 7 and decided it was waaay too late to roast a head of garlic, so I decided to use some handy dandy garlic paste from the fridge instead. I also added some mild italian sausage because I wanted to make sure there was plenty of flavor. I used fresh cremini, shiitake and oyster mushrooms because I have had terrible experiences with dried ones and plenty of sage and parmesan.


I liked that the sauce was only reduced chicken stock, which provided lots of flavor without masking the mushrooms or the sage and I would totally make it again. I added plenty of parmesan cheese at the end and served it with baby romaine greens. Success! Now if I could just learn to take a photograph...


Saturday, September 19, 2009

A Dogpatch Favorite: Kitchenette

I wanted to share one of my very favorite lunch spots in the Dogpatch. It's called Kitchenette, and is one of those places that can only exist in San Francisco. Their tagline is "spontaneous organic covert nourishment" and they serve local, seasonal, organic food out of a loading dock on Illinois street, only feet from the water. The menu changes every day, and everything is as delicious as it is simple. You can also get a great lunch for under $10, which is rare in SF.


I went there on Thursday and got the summer vegetable sandwich. It was described as "cucumber, tomato, avocado, olive oil fried peppers, onions" on their simple and easy website, which updates the menu every day, and cost $7. It was heavenly! The sourdough loaf, which was baked fresh by Acme Bread was a meal in itself, but all the veggies inside were ripe and wonderful, especially the heirloom tomatoes, which were so red they were almost purple, and the generous helping of avocado.


I am lucky enough to be two blocks from this delicious spot, but it's worth a quick drive to check it out. They are open from 11:30 to 1:30 and are cash only. They say supply is limited so come early, but I've never been there when they have run out of something.


Check out their website at KitchenetteSF.com for menus and more info. YUM!

Wednesday, September 16, 2009

Grilled Skewered Shrimp and Greek Salad with Orzo

I'm back from a 10 day trip to Texas and then Monterey for work/pleasure, and so glad to be back at home after so many nights away. While in Dallas and Houston I ate some delicious Tex Mex and Barbecue, but definitely missed my vegetables, which I could hear calling to me as they went bad in my fridge back at home. Now that I'm here and back in the swing of things I hope to get back to cooking, but here is a recipe from before I left.

I made this dinner because I was craving a greek salad. It was during a warm night in last August and I spent the majority of the afternoon at work dreaming about it. I combined the veggies in my fridge with a little feta and had a great side for my grilled shrimp.


The shrimp came from Whole Foods and were marinated in a lemon thyme concoction (I think) according to the sign. All I did was throw them on the indoor grill until they were pink. Yum!

Greek Salad with Orzo
1 pint Cherry Tomatoes
1 med. Red Onion
1 lg. Cucumber
1 Pear
Orzo Pasta, cooked and drained
Feta Cheese, crumbled

Dressing:
Red Wine Vinegar
Olive Oil
Lemon Juice
Honey
Salt and Pepper


This was so long ago I can't remember what my measurements were on the dressing, but I know it was tangy with just a touch of sweet, light and refreshing. It was easy to chop the veggies while the pasta was cooking then toss them all together with an eyeballed mix of dressing ingredients. I may have gone overboard with the dressing because the salad was a little juicy. I loved the little bit of sweetness the pear provided and the way the orzo offset all the veggies. This meal was perfect for a warm night.

Wednesday, September 2, 2009

40th Anniversary Party Ceviche Apps

Ryan's parents celebrated a great milestone earlier this month, their 40th Wedding Anniversary! His family is famous for their home planned and orchestrated parties and this one was no different. The 11 of us (Ryan, his 5 brothers and sisters along with significant others) put together a pretty awesome party, a sit down dinner for 60 in their parents back yard. There was a roast pig on a spit (more on that later), home made sauces, lots of salads and grilled veggies and a number of passed apps.

Ryan and I were in charge of a couple apps, and decided to try a home made ceviche in Tostitos Scoops! I was nervous about the Scoops getting soggy, but they didn't! It turned out to be a perfect bite of fish in a crunchy and salty cup! We will definitely do it again.

I didn't follow any real recipe, so these quantities are guesstimated.

Simple Ceviche
1/2 lb. Halibut
1/2 lb. Tilapia
1 lb. Bay Scallops
1 lb. medium tail-off Shrimp
4 lemons
5 limes
4 large heirloom tomatoes
1 large red onion
1 large bunch cilantro
2 jalapeno peppers
Salt, pepper, cumin and tobasco to taste
Avocado for garnish
Tostitos Scoops


I used a combo of halibut and tilapia for my white fish because the halibut was expensive and the tilapia was not as well as bay scallops and shrimp, but you could really put any combination of white fish or shellfish in the ceviche. I chopped the fish into small pieces and fully covered it with a combination of lemon and lime juice, as well as the zest of 1 lemon and lime each, and put it in the refrigerator. While the acid from the juice was cooking the fish I diced the tomatoes (the smaller the better) and thinly sliced and chopped the red onion, the jalapeno and cilantro. I combined the "salsa"ingredients, seasoned them and added them to the fish to sit overnight. It's important to let the ceviche marinate in the fridge overnight in order to make sure the fish is completely cooked as well as to get the flavors to blend. This recipe was simple, but fresh and delicious!

We served the ceviche in scooops as an appetizer, but you could serve it as an entree in a martini glass or fimly style in a crystal bowl.

*Sorry we didn't get any finished pictures... but it was definitely a beautiful app.

Monday, August 24, 2009

I'm back

Okay... months later I'm back and I'm going to give this thing another shot. I had a bit of an issue with the comp... it was full. So full that I couldn't even put one photo on it. I've been cooking and so enjoying my CSA box this summer! I've had more delicious tomatoes than I can count. It's also been so fun to follow the local cooking blogs and see what people out there have been cooking.

I also started a new job since I've been away. I'm now in sales with Watermark Press, a commercial printing company in Potrero Hill. It has been a challenging road as I cold call companies and try to build a business, but I'm really enjoying it.

So wish me luck! Hopefully I'll be able to go the distance this time.

Tuesday, March 3, 2009

Broccoli and Spinach Soup

It won't stop raining in San Francisco. I KNOW we need the rain and it's fantastic that we're getting so much of it because it will mean (hopefully) no water rationing in August, but every morning when I put on my rain boots and pull out my umbrella and head downstairs to wait for the bus all I want is the beautiful sunny days we had in January back. One good thing about the rain, however, is making soup. I'm learning that soup is really pretty easy. You can put just about anything in a pot with some chicken stock and call it soup.

I had some broccoli and spinach in the fridge to use, so the other night I decided to make some green soup. It turned out thinner than I wanted, but was still tasty and (other than the cream I added) fairly healthy.

Broccoli and Spinach Soup
1 yellow onion, chopped
1 tbsp garlic
5 cups broccoli florets
1 bag baby spinach
2 14 oz. cans low sodium chicken broth
1/2 cup heavy whipping cream
1/4 cup parmesan cheese
Salt and Pepper to taste

I sauteed the onion and garlic with some evoo. I poured in a couple cans of chicken stock and got it boiling. While the stock was heating I chopped the broccoli into smallish pieces (reserving about 1 cup) and added it to the pot. I threw in the spinach and let it cook down.

After 10 minutes or so of simmering, I threw it in the blender, being sure to make sure the little cap on the lid was removed so the steam could be released as I blended it. When it was blended I added the cream and the parmesan and a little salt and pepper and gave it another whirl. I transferred it back to the pot and added the reserved broccoli for some texture, cooking it for another few minutes and... Voila! SOUP!

I served the soup with some parmesan toasts and a healthy dose of black pepper. It was green and comforing and it kept me warm until the next morning when the bus was 10 minutes late and I had to run through Union Square to make it to work on time.... even good soup has it's limits.

Saturday, February 28, 2009

Who needs to create their own recipe when they can borrow someone else's

I've been reading a lot of food blogs these last few weeks. Before I started getting my CSA box the end of last year, my only real source of inspiration for cooking interesting and diverse meals every night was myrecipes.com or epicurious.com. Don't get me wrong, I have a LOT of cookbooks, but when you're looking to create a meal with a specific ingredient like collard greens it's going to take a lot of cookbooks to come up with something perfect for dinner. I had no idea there were so many professional and ameteur cooks out there willing to share their creations in words and pictures.... and these are some beautiful creations! I find myself drooling daily over the food photography and recipes, and so many of them are way healthier than the cream filled, calorie filled recipes you find so many other places online. I admit it, I'm addicted. In the past month I've found probably 20 blogs that are not only easy to read, but so easy to follow using the blogger.com tools. All of them put my cheesy descriptions and crappy photography to shame. But they also give me something to aspire to. And who doesn't like that?

Looking for something interesting to do with collards, a new veggie for me, I decided to search some of these new found sites for inspiration and decided to replicate a mexican dinner fritatta from Coles Kitch. It was delicious and exactly what I was looking for. Being a lover of eggs with a kick, I added some Tobasco to the egg mixture before cooking, and next time I think I'd add even more.
With my new found "friends" on the internet, cooking with crazy ingredients is easier than ever and the other cooking sites out there have just lost one of their best customers... If someday people come to this site and get even half as excited as I do about others, I'll be proud.

Thanks Cole for the recipe and the inspiration.

Thursday, February 26, 2009

Arugula Pesto: like salad, but warmer

I've got nothing against salad. During summer when it's still light out at 8 o'clock and I can leave the windows wide open I'll make dinner salads for nights straight. That being said, when it's cold and rainy and I get home from work after dark a light, crisp salad is the last thing I want. When I got the beautiful arugula in my CSA box I had the best intentions of creating a nice spicy salad, but a week later my greens were looking wilty and I still wasn't in the mood for a cold dinner.

Always the brilliant idea guy, Ryan suggested I make a pesto with our arugula. After spending some time on Google pouring over recipes I found a blog called In My Kitchen Garden whose writer, Farmgirl Susan, had a similar quest on her hands in the Spring of 2006: Searching for the Best Arugula Pesto Recipe. I followed her recipe almost exactly (I say almost because I never measure out my greens, I just throw them in) and I added some fresh lemon juice to balance out the spice. The pesto was thick and hearty. I warmed it up and tossed it with some whole wheat penne and sliced chicken breast and it was a fantastic (and warm) meal for a cold February night.

Farmgirl Susan's blog also has some great ideas for what to do with the pesto beside just tossing it with pasta. She also has a recipe for an arugula pesto pizza that I will definitely try sometime soon.

Sunday, February 22, 2009

Experimenting with Radicchio

Radicchio is one of those winter vegetables that I would never buy if it didn't come in my FFTY box. I remember picking it out of salads when I was younger (does last year count as younger?) and have never quite found a way to incorporate it's bitterness into a meal and make it taste good. When I read the recipe for Trevisio Radicchio and Red Onion Tart on iloveyoumorethanfood I decided I would do something similar with my next batch of beautiful purpley leaves.

Then, the other morning, already starting to worry about how the tart would come out that evening, I went to pull a pizza crust out of the freezer (I know I should make it myself, but for the money you just can't beat the Trader Joes almost whole wheat dough for $1.29) and realized I didn't have any left. Saddened I got on the bus and headed to work, arriving there two minutes too late and getting locked out while they pulled the jewelry from the vault. With some time to kill, I decided to head next door to the beautiful Williams Sonoma to oogle some kitchen gadgets. I thought maybe the team there would know of a place in the Union Square area to get a premade crust, and just happened to ask the house chef, who made my day by disappearing upstairs and returning with not one but two frozen pizza crusts that he'd made at a recent cooking class. I left Williams Sonoma that morning with the crusts, a vegetable steamer, and a flyer for my new friend, chef Gary Bulmers cooking classes. (I'm trying to convince Ryan to join me for Sashimi and Sushi: An Introduction on March 12.)

With this good omen for my evening meal and a new outlook on my day I headed to work and spent the day telling coworkers about how I just got free pizza crust from the chef next door and trying to work out in my head just how I was going to turn radicchio and kale into something delicious.

That evening I crossed my fingers and got to it in the kichen, chopping veggies, rolling out dough and sauteeing. I decided at the last minute to create a calzone which looked beautiful coming out of the oven (I'm so bummed I forgot to get a picture of it) and tasted unique. Ryan always tells me my dinners are delicious whether I deserve it or not, and after pressing him for his real opinion he told me it tasted "gourmet". I took it as a compliment and called the expirament a success.

Radicchio, Kale and Red Onion Calzone
1 small head radicchio
1 bunch dino kale
1 medium red onion
1 tsp garlic
1/4 cup basalmic vinegar
1 premade (or homemade if you have the time) pizza crust
1/2 cup part skim ricotta cheese
1/4 cup fresh grated parmesan cheese
Premade marinara sauce for dipping

Sautee red onion and garlic in a large pan until onion is soft. Add the chopped radicchio and kale and cook for about 5 minutes, until they begin to wilt. Pour basalmic over greens mixture and cook for a few more minutes, letting the vinegar seep in.

Work the pizza crust on a stone or large cutting board until it's thin and about 12" in diameter. Spread the ricotta cheese on 1/2 of the crust, as you will be folding the other half of the crust over to create the calzone. Pour your sauteed greens mixture over the ricotta and top with parmesan cheese, reserving a little cheese to sprinkle on top of the folded crust.

Place your calzone on a pizza pan on baking sheet and bake in a preheated 450 degree oven for 18-20 minutes or until the top is golden brown. Slice calzone into six pieces and let cool. Serve with a side of warm marinara sauce (whatever you have open in the fridge) for dipping.

Seafood Chowder

I created this chowder to use the leftover lobster from our Valentines Day dinner. I was hoping for something delicious and creamy like the chowder I ate back in college at Splash Cafe in Pismo Beach, but, um, low cal and cream free (yeah right). It turned out less creamy and more smoky, but it was still pretty good, and a great way to use the leftovers. This recipe made enough for two for dinner, lunch leftovers, and a freezer container for another night.


Lobster and Clam Seafood Chowder
1 yellow onion, diced
2 ribs celery, sliced
6-7 fingerling potatoes, cubed
1 bay leaf
1 tsp italian seasoning
2 packages cooked clams
1/2 cup shelled and chopped lobster
1 12 oz can chicken stock
1 8 oz bottle clam juice
4 cups lowfat or nonfat milk
1/2 cup flour

Sautee onion and celery in olive oil in the bottom of a large pot. When the onion is beginning to carmelize and the celery is soft, add chicken stock, clam juice italian seasoning and bay leaf to the pot, then add the cubed potatoes and simmer until they begin to soften. Whisk together the milk and flour in a separate bowl and add to the pot. When the chowder is fully heated and begins to bubble add the clams and lobster. Simmer for a few more minutes and then serve! We topped ours with green onions and tobasco sauce. Not dreamy, creamy, Splash! Chowder, but a nice warm dinner on a cold night nevertheless.

Saturday, February 21, 2009

Eggs Florentine

As I'm learning, when you get busy, taking the time to write about what you are eating gets difficult. I am inspired by all the women out there with jobs and families that still have time to sit down at their computers and help other home cooks by writing about what they are doing in the kitchen. This week I cooked lots of great meals, but didn't photograph all of them and didn't write about any of them. I'll try to catch up this weekend.

Eggs Florentine is definitely a special treat for us. It's turned into our special occasion breakfast, reserved for holidays, but I don't know why because it's delicious and it's not that hard if you have premade frozen hollandaise available... maybe it's the stick and a half of butter that goes into the sauce that keeps us from eating these regularly. We like to make a full batch, use about 1/3 of it and store the rest in ziplock bags in the freezer where it's easy to pull out and defrost.

Ryans Yummy Hollandaise
2 egg yolks
3/4 cup butter, melter
juice of 1/2 lemon
pinch of cayenne pepper
Salt and pepper to taste

Place egg yolks and lemon juice in a double boiler and whisk constantly until the mixture is just beginning to thicken, then slowly whisk in the melted butter. The mixture should be thick-ish... about the consistency of a heavy salad dressing. Simple but delicious.

Eggs Florentine
(this is ingredients and prep for one serving)
2 eggs
1 whole wheat english muffin, halved
4-8 leaves of spinach, depending on size
2-4 slices tomato
1/2 avocado

I get the ingredients prepped first, toasting the english muffins and slicing the tomato and avocado. When poaching eggs I've had the best luck using a large flat bottomed pan with about 2" water in it. I put the heat on medium high and add the eggs when the water is just beginning to boil (little tiny bubbles in the bottom of the pan). I read somewhere the best way to add eggs to boiling water so the whites don't separate is to break the egg into a large cooking spoon, then slowly lowering the spoon into the boiling water and easing the egg off the spoon.... I'm sure for an expert cook this is easy, but when I try to do it by myself I feel like I don't have enough hands, so I used Ryan's help. The eggs boil for 5-7 minutes, and I like the yolks runny so I pull them out as soon as a film develops over the yolk.

Assemble the eggs benedict by placing the english muffin slices on a plate. Layer the spinach, avocado and tomato on top of the muffin, creating a flat surface for the egg to rest on. Place an egg on the top of each sandwich and top with hollandaise sauce and paprika. Enjoy!

Wednesday, February 18, 2009

Happy Valentines Day!

Well, we're a few days past Valentines Day, and I'm just getting around to posting about the feast we made for the holiday. Last Saturday marked 4 years from my first date with Ryan, and instead of fighting the crowds for an overpriced price fixe menu we decided it would be best to create something delicious at home, with the extra advantage of eating a gourmet meal in our pajamas (and, of course, the downside of dishes). Ryan took advantage of a special at Mollie Stones and ordered us two lobsters and two 6 oz. filets and I was surprised on Friday evening to come home to the little guys walking around on our kitchen counter.

We spent the majority of the day cooking, starting with eggs florentine in the morning (which I'll post later) and our lobster filet combo in the evening. It was fun to work together in the kitchen and the added challenge of boiling lobster for the first time at home made it exciting. In the end we had a feast all laid out on the table we pull from the wall into the living room for special occasions because our tiny apartment is not equipped with a dining area. I've posted pictures and recipes below, but this meal was less about creation and more about delicious ingredients... it kind of cooked itself.

I hope you had a very happy Valentines Day and that you have lots of love in your life!


Valentines Day Surf and Turf Meal for two
2 live lobsters
2 6 oz filets

For red wine reduction
2 cups sliced white mushrooms
1.5 cups red wine
2 cloves garlic, minced.

For lobster
2 large pots of boiling water
2 bay leafs
2 tbsp italian seasoning (or fresh hebs)
2 lemons, halved
1/2 cup butter

For veggies
1 red bell pepper, sliced in strips
1/4 lb green beans, ends removed
1 bunch baby carrots, peeled

Start with the reduction as that will take the most time and it'll keep as the protien cooks. Place mushrooms in a large sautee pan with garlic and cook down. Add the red wine and simmer for 30-45 minutes on med-low until wine thickens into desired consistency. When sauce is almost finished, fill the pots with water and get them on the stove on high.

Season filets with kosher salt and black pepper. Sear filets on all four sides to keep in the juices and place on a broiler pan. Cook in a 350 degree oven for 20 minutes. Filets should be medium rare.

Season the water with a bay leaf, 1/2 a lemon (juice it then throw it in), and the italian seasoning or fresh herbs. After putting the filets in the oven drop in the lobsters, cover and boil. Our guys, who were a pound and a half each took about 15 minutes to boil.

While the lobsters are boiling, sautee up the veggies with some olive oil, garlic, salt and pepper and melt the butter at the last minute, straining through a seive to remove the milk fat and add a squeeze of lemon to the strained butter mixture.

If all goes well everything should be finishing up at the same time. Plate your feast and enjoy it's decadence with your love!

Friday, February 13, 2009

Flank Steak Three Ways

This being the week before Valentines Day, things were very busy at Tiffany. We have been swamped with boyfriends and husbands coming in to find something special for their ladies, and it's always so fun to help them decide what will be best. Because of our extended hours I haven't been getting home until around 8, and Ryan has been fantastic on dinner duty.

We were able to make due (almost) the whole week on a pound of flank steak from Monday. Between an asian bok choy stir fry, flank steak tacos with some wicked homemade roasted tomatillo salsa, and a steak sandwich with horseradish cream sauce and au jus we were well fed happy campers.


Asian Steak and Bok Choy Stir Fry

For the stir fry:
1/2 lg yellow onion, sliced
1 red bell pepper, sliced
8-10 "baby bella" mushrooms
4-5 heads baby bok choy, sliced vertically
1 cup less sodium beef broth
2-3 tbsp cornstarch

Quick flank steak marinade:
1/3 lb. flank steak
2 tbsp grated fresh ginger
1 tbsp minced fresh garlic
3 tbsp soy sauce
2 tbsp sweet chili sauce
1 tsp toasted sesame oil
1/2 tsp crushed red pepper

Place marinade ingredients in a zip lock bag and add the flank steak. Set it aside to marinade. Chop the vegetables for the stir fry, and sautee the onions and bell pepper first, add the mushrooms until the cook down a little, and transfer to a large bowl and keep warm. Use the same large sautee pan to cook the bok choy until the leaves begin to wilt and the bottoms get tender. Add to bowl to keep warm. Now add the steak and marinade to the pan and cook steak 7-8 minutes on each side. Remove steak to cool and add the beef broth to the pan with the remnants of the marinade. As it cooks down, add the cornstarch to thicken the sauce. Slice the meat and add to the bowl with the veggies. Pour the sauce iver the top and toss. We served this over brown rice.

This was tasty and also great the next day as leftovers. I thought it tasted a bit like the mongolian beef we order from time to time at our favorite Chinese Delivery place.

Flank Steak Tacos with Roasted Tomatillo Salsa
For tomatillo salsa:
7-8 fresh tomatillos, skin removed
1/2 large yellow onion, sliced
2 medium jalapeno peppers, stems removed

Marinade for steak:
Juice of 2 limes, zest of 1
1/4 cup tequila
2 tbsp chopped cilantro
salt and pepper to taste

Place the tomatillos on a roasting pan and cook under the broiler 7-8 minutes on each side. Pull tomatoes out of the oven and add them to the blender, add the sliced onion and halved jalapenos to the roasting pan and place them in the oven to broil for an additional 7 minutes. Blend tomatoes, add salt and pepper and onions and jalapeno. Blend until smooth. While the tomatillos are roasting put the marinade on the steak and set aside.

I made the salsa and added the marinade to the steak in the morning, and Ryan grilled the steak that evening with some red onion and cooked up some pinquitos, my very favorite tasty beans. We sliced the steak and served the tacos on corn tortillas with a quick romaine salad with tomatillo salsa vinagrette.

Flank Steak Sammies with Au Jus
Grilled sliced flank steak
1/2 yellow onion, sliced
1/2 red bell pepper, sliced
1 tsp minced garlic
Swiss cheese, sliced
Sliced sourdough bread
Horseradish cream sauce (cut with a little low fat ranch dressing)
1 cup beef stock

Sautee onions and red bell pepper in a quick pan, add steak and cook just until warm. Toast sourdough bread and spread horseradish sauce on insides of bread, add beef mixture and top with swiss cheese. Place in the oven, open faced, under the broiler for a minute or so to melt the cheese. While cheese is melting, add the beef stock to the sautee pan and deglaze with it, being sure to get up all the yummy onion and beef bits. When it's warm place in a ramekin for dipping. Finish the sandwich by slicing diagonally and serve with the au jus and a quick greens salad. SO good!

Monday, February 9, 2009

Rainy Day Baked Oysters

On Sunday Ryan and I were super excited about heading out to Hog Island for oysters with some friends. It's always so much fun to get together over the barbecue with friends and eat the freshest, most delicious oysters the churning waters of the Pacific can provide fresh out of the shell. Unfortunately for us, the weather didn't cooperate and we found our party rained out. We were so excited about the oysters though that we decided we weren't going to let a little rain stand in our way. We bundled up, headed down to the Ferry Building and got a dozen fresh oysters (for $1 each) from Ferry Plaza Seafood. While we were there we also grabbed some great produce from the Farm Fresh to You booth, which was especially fun since so much of it is the same produce we get in our boxes.

Shucking and baking oysters is hard work, but they're so delicious it's totally worth it. We're used to the oysters popping open a little on the barbecue which makes them easier to shuck, and raw those suckers really had a good hold on their shells. I've included a picture of Ryan working on one. It's a good thing he's so strong because it took me about 30 seconds before I gave up and handed the task over to him.

Left: Raw oysters.
Right: The finished product!


Italian Style Baked Oysters

12 oysters, scrubbed and shucked
2 tbsp chopped fresh basil
2 tbsp chopped green onion
2 tbsp chopped baby spinach
2 tbsp grated parmesan cheese
1/3 cup italian style bread crumbs
4 slices bacon, cooked and crumbled
1/2 stick butter melted
juice of 1 lemon
rock salt

Combine all the dry ingredients (basil through bacon) in a small bowl and set aside. Fill a 9x12 Pyrex baking dish 1" deep with rock salt and nestle the raw oysters into the salt bed. Cover each oyster with the dry ingredients. Melt the butter in the microwave, add the lemon juice and stir. Pour 1/12 of the butter mixture over each oyster. Bake for 10 minutes in a 450 degree oven. Yum!

To complete our feast we cut up some broccoli, brussel sprouts, crusty bread and a red and green apple and dipped them in a deliciously easy pre-made cheese fondue from Trader Joes. It was too much food, but it sure was tasty!

Saturday, February 7, 2009

PreValentines Treat - Red Beets

Last night we were both pretty exhausted from a long week and decided to stay in. I had been contemplating a beet risotto since getting the beautiful red roots the week before and figured tonight was the night to try it out. What I wasn't prepared for was just how RED this meal was going to turn out.... near the end of cooking it I was confused as to whether I was making risotto or spaghetti sauce.

Confused by the red color I had Ryan Google beets while I was cooking and we learned that the red color comes from a pigment called betacyanin. This pigment is used industrially today to color tomato paste, sauces, desserts, jellies and ice cream, and I can tell why; just slicing the beets turned my fingers bright pink. We also learned that beets have been cultivated since the second millenium BC, probably started somewhere in the Mediterranean and were spread as far east as China by 850 AD. I could just imagine women using beets to redden their cheeks and lips, Memoirs of a Geisha style as I worked with them. It sometimes amazes me what kinds of colors can be found in nature! Below is my recipe for this Red RED Beet Risotto that would be a fabulous addition to a Valentines Day menu, and tasted deliciously rich with just a touch of sweetness.

Red Beet Risotto
3 red beets, stems removed and peeled
1 medium white onion, chopped
1.5 cups long grain white rice
3 cups chicken stock
1 cup white wine
1 cup (or so) water
1/2 cup grated parmesan cheese

I grated two of the beets in my itty bitty food processor, which didn't work very well, so I chopped the last one into 1/4 inch cubes. Then I chopped the onion and added it to a large, deep, saucepan with some olive oil. When the onions started to soften up I added the beets and sauteed for a few more minutes, then added the rice. The rice turned bright pink almost immediately. I added the liquid slowly, stirring constantly. I used the chicken stock first, then the white wine and finally added water until I achieved the consistency I wanted, which was smooth and creamy. The stirring process took just over an hour. Just before serving I added the parmesan cheese, folding it in to the literally "beet red" risotto.

The risotto made 4-5 good size servings. I topped it with some fresh grated parmesan cheese and black pepper and served it with a quick tilapia en papillote that I'd baked in the oven with some basil and parsley, lemon juice and butter. The risotto was yummy even though I admit the color was a little off-putting. I will definitely make it again, maybe next time serving it as a bed under a breast of chicken coated with bread crumbs and some parmesan cheese. Next time I would think ahead and cook the beet greens as well as a side dish.

I learned about the beets from my good friend wikipedia. Here's the link if you're interested: http://en.wikipedia.org/wiki/Beet. I was also surprised to learn that the amino acids in beets have anti-cancer properties and have been used to treat leukemia (in huge quantities). They also say drinking beet juice can inhibit the development of colon and stomach cancers. Who knew?

Friday, February 6, 2009

Penne with Roasted Fennel and Goat Cheese

I had hoped that my first actual recipe entry to this blog be something amazing, seasonal and delicious, and although I had the highest hopes for last nights dinner, it didn't turn out exactly as planned. I had two beautiful heads of fennel from last week's FFTY delivery that needed to be used, and after doing a little research I found a few recipes that paired roasted fennel with sundried tomatoes and goat cheese so I decided to create a whole wheat penne dish using those ingredients. As it turned out the sundried tomatoes I had on hand were a tad over-the-hill and unusable, so I substituted fresh (out of season I know, but it's always summer somewhere) and added some grilled chicken strips for a little protein.

Whole Wheat Penne with Roasted Fennel and Goat Cheese

2 bulbs fennel
2 medium tomatoes
6 oz grilled chicken strips (I just use the frozen bagged ones from Costco)
2 cups whole wheat penne
Zest and juice of one lemon
1/4 cup fresh basil
1/4 cup fresh parsley
2 oz goat cheese
2 tbsp olive oil
salt and pepper

Get a large pot of water boiling over the stove. When water is boiling add 2 cups whole wheat penne pasta. Cook al dente.

While pasta is cooking, cut fennel bulb into quarters then into 1/2 inch slices. Arrange on a baking pan and lightly coat with olive oil (I used my handy misto) salt and pepper. Roast for 10 minutes at 425 degrees, flip and roast on the other side for another 5 minutes or so. Remove from oven. Once fennel has had a little time to cool, remove the core and separate fennel slices. Place slices in a large, shallow bowl.

Chop tomato, basil and parsley. Add tomatoes, basil and half the parsley to the bowl, reserving the other half for garnish. Add lemon zest and lemon juice, stir. Add cooked pasta, grilled chicken breast and olive oil, fold together. Last, add the goat cheese and fold in. Garnish with parsley and fennel fronds if you have them. Serve with salad greens with a light vinaigrette.


So even though I got compliments from Ryan and my bother (who just started a job in the area and is staying with us for the week) about the fresh light flavors of this dish, I was a little disappointed. Working with fennel is new to me and when it came out of the oven it tasted so good, sweet and soft and a bit anisey, and I wished I could have done something with the rest of the dish that highlighted it a little more. As it was I felt it got lost with too many other flavors in the dish.... I was thinking maybe next time I should sautee it with some onion and either add it to pasta or put it on top of a pork chop. If anyone has some suggestions on a great way to use fennel that really highlights its unique flavor, I'd love to hear them.

Thursday, February 5, 2009

Welcome to my Food Blog!

Truthfully, I've never considered myself a writer (or a cook for that matter) but recently I have been inspired to start recording my adventures in the kitchen. This inspiration has come from a few places: the first was my recent decision to start having delicious, local, Linkorganic produce delivered right to my doorstep with CSA delivery from Farm Fresh to You. The next have come in the form of other local women that are recording their kitchen creations in this manner. I have been checking out CSA Delivery, Coles Kitch, and iloveyoumorethanfood on an almost daily basis since I found out about them in my FFTY delivery newsletter and I figure if they can do it, I can do it. So ladies, if you happen across me and my recipes, realize that imitation is the sincerest form of flatter (and I hope you like my food).

I have always loved to cook, but I admit I wasn't much of a cook until I moved in with my boyfriend Ryan almost three years ago. Ryan, the youngest of six kids, grew up cooking and was very patient with me as I learned my way around the kitchen, first by cooking with me and then by complimenting every dish I cooked (whether it turned out well or not) and helping me to learn what flavors work well together. I relied heavily on recipes at first, especially those from CookingLight, my very favorite magazine, and although I still love to check out websites and cookbooks for ideas I'm much more creative these days. I try to cook as healthy as possible and use lots of Mediterranean flavors in my recipes (I would eat pasta every day of my life if I could). I love cheese and beans and red onion and I think my very favorite food in the whole world is avocado, so you'll also see a little mexican influence in my food as well.

I hope you like this blog and the recipes in it. Also, please be patient with my ridiculous run-on sentences and fluffy writing.... hopefully it will improve the same way my cooking has.